Setting Up Your Hung Curd Maker for the First Time: A Step-by-Step Guide
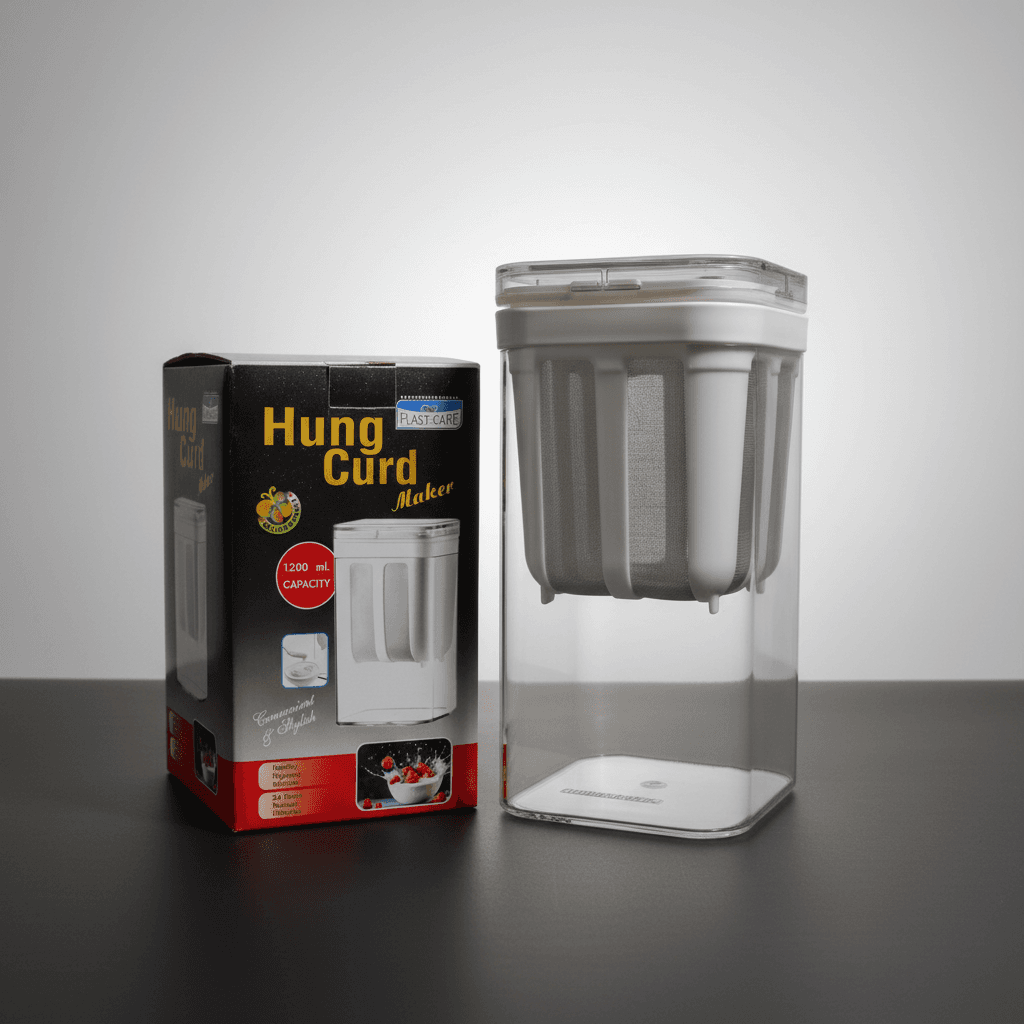
The Hung Curd Maker (1200 ml Capacity) is one of the simplest tools in the range to set up, but the first-time process benefits from knowing what to expect — mainly around timing, since hung curd's thickness depends entirely on how long you let it strain.
Ready to shop this guide?
Shop the Hung Curd MakerStep 1: Understand the parts
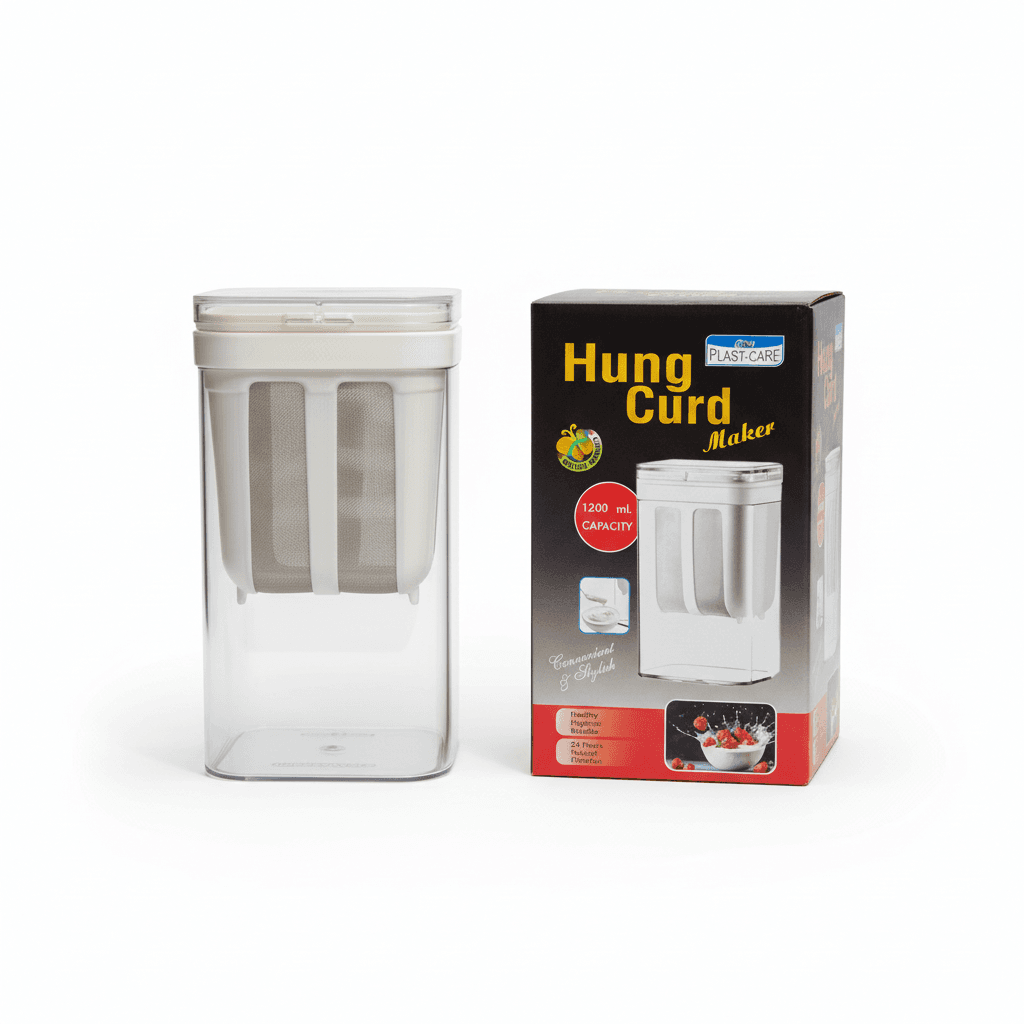
The set consists of a transparent outer container and an inner strainer fitted with fine mesh filters. The outer container collects the whey (liquid) that drains out, while the inner strainer holds the curd and lets the mesh filter separate solids from liquid naturally, without any pressing or squeezing needed.
Step 2: Assemble and add fresh curd
Fit the inner strainer into the outer container. Pour fresh curd (dahi) into the inner strainer — the 1200 ml capacity gives enough room for a batch suited to making Greek-style curd, a paneer base, labneh, or other strained dairy preparations. Avoid overfilling past the strainer's rim so there's room for the whey to separate and settle below without overflow.
Step 3: Cover and refrigerate
Cover the set and place it in the refrigerator. This is the step where timing determines your result: straining for roughly 24 hours produces a moderately thick hung curd, suitable for everyday cooking and raita. Extending to 48 hours produces a noticeably thicker, creamier result closer to labneh or a paneer-adjacent texture, suitable for spreads or richer dips.
The transparent outer body lets you check progress visually without having to open and disturb the setup, which is a genuine convenience over opaque straining methods like a muslin cloth tied over a bowl.
Step 4: Check thickness and separate
After your chosen straining period, lift the inner strainer out — the hung curd stays in the strainer while the collected whey remains in the outer container. If it's not yet at your preferred thickness, you can return it to the refrigerator for additional time.
Step 5: Use the whey, don't discard it
The collected whey doesn't need to be poured away. Reusing it in cooking or baking reduces waste and gets extra value out of every batch of curd you strain.
- Use it as a tangy liquid base for kneading dough instead of plain water.
- Add it to smoothies or lassi for extra protein and a subtle tang.
- Use it in soups or curries in place of some of the water content for added flavor.
- Water plants with it occasionally — its mild acidity is generally fine for most soil in small amounts.
Step 6: Clean and store
After use, the set disassembles easily for cleaning — wash the inner strainer's mesh filter thoroughly to prevent residue buildup, which can affect straining efficiency in future batches. Once dry, the compact design stores easily in a cabinet or refrigerator door shelf, ready for the next batch.
Choosing the right curd to start with
The quality of your starting curd has a real effect on the final result — fresh, thick curd generally strains into a richer hung curd than thin, watery curd, since there's simply more solid content to begin with. If your regular curd tends to be on the thinner side, you may find you need slightly longer straining time to reach your preferred thickness compared to using a thicker starting curd.
Troubleshooting a first attempt
If your hung curd comes out thinner than expected after 24 hours, that's normal for a first attempt — simply return it to the refrigerator for more time and check again, rather than assuming something went wrong with the setup. If whey isn't draining at all, check that the inner strainer is seated correctly in the outer container and that the curd wasn't overfilled past the strainer's rim, which can restrict proper drainage.